Wednesday, April 4, 2012

Springtime greeting cards

 The robin is always reminds me of Springtime. I am so happy to hear and see many fat robins poking around for their breakfast in my back yard.
I had a few Thank yous I needed to write and a birthday card, so I thought I would make some Springy cards.
The leaves, eyes, wing are cut out, the rest is ripped paper. Branch is drawn.

Painted jar with blossoms

 Take an old jar that you like the shape of.
 Paint the inside your paint color of choice. Let it dry.
 I filled mine with dry beans. I followed Martha Stewarts tutorial to make this stick with paper blossoms on it.
It makes it feel like Spring, even if it doesn't feel like it outside.

Tuesday, March 13, 2012

Tutorial: Framed dry erase board

1.Get an old frame from a thrift store. Just choose a size you like.
2. Take out the glass and picture and backing. Clean everything really well.
 3. While you could easily spray paint the frame any color you choose, we painted because we had the paint we wanted to use. Craft paint dries really fast. Because the frame was a dark green we first painted the frame a pale pink as a primer. Then we painted over that two coats of a darker pink.
Just paint your frame until you are happy with the way it looks, then let it dry completely.

 My daughter did almost everything on this project in an afternoon. Super easy, super fast project.
 4. Choose a fabric that you like, that matches your frame. Cut it the same size as the glass. We ironed ours so that no wrinkles would show.
5. Replace the glass in the frame, then the fabric and put it all back together. Use dry erase markers on the glass.

New custom-made dry erase board: $3

Monday, March 5, 2012

How to: Make Accordian Fan Decor

 I was in charge of decorating for a church Valentine's Day Party. I LOVE how these pinwheels (I don't even know what they are called? Fans?) turned out.
The two biggest (middle pink, and far right red) were made out of wrapping paper (15 inches wide) I am not sure how many feet were on the roll. We just kept accordian folding until the roll was finished.
All the others were made from poster board. The ones with stripes and polka dots were painted. I only had red and white poster board and just went from there. The biggest ones made from poster board are 3 half sections of poster board.
As far as a tutorial, here would be the steps.
1. Get two regular posterboards (it comes in extra thick, also. Don't get that.)
2. Cut them both lengthwise in half. You will use 3 of the halves.
3. Accordian fold all three sections the same width. I used a ruler and scored the posterboard with a bone folder. I just used the width of the ruler so each of the folds would be equadistant from each other.
4. I stapled the sections together, fanning them out to make the circular shape. I am sure you could try glue, or tape. I didn't think the staples were obvious.
5. To stabalize the fan to make it easier to hang I hot glued a paper plate (with the rim cut off) to the back.
6. Also to stabalize, but also to make it cute, I cut out scrapbook paper circles for the front centers and added a heart on top.
7. I ran into some problems trying to hang them, but then came up with this solution that worked great. I twisted a pipecleaner with the ends together but the middle open so it looked like the eye of a needle (wouldn't a picture be helpful?) and the glued the twisted part on the back onto the paper plate so it only needed one push pin on which to hang.
Vwala!

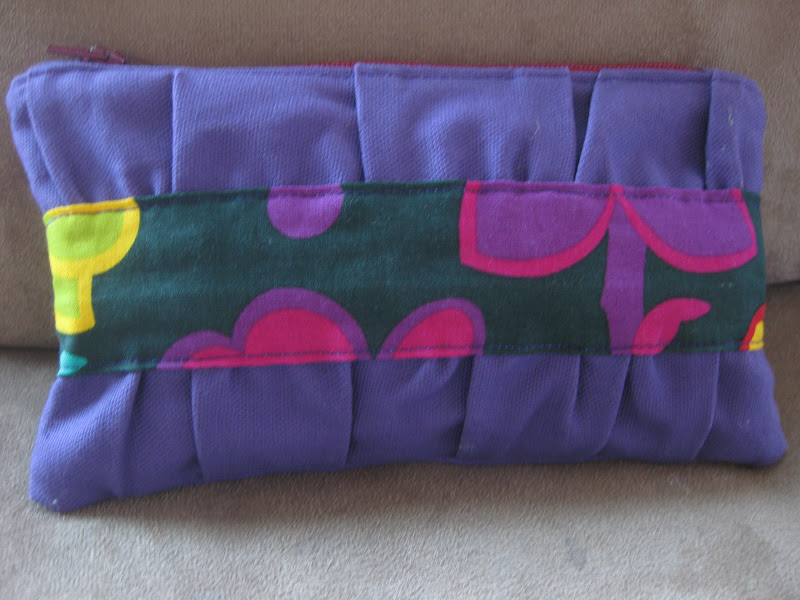
Purple zip pouch

 I have made a gazillion of these pouches. Since I am currently obsessed with purple, I decided I needed a purple for myself.
I also put a fun floral print inside. I didn't mean for it to look Hawaiian, but everytime I opened it when I was in Hawaii it felt right.

Monday, February 6, 2012

Refinished credenza

 I have been looking for a credenza to house the flat screen T.V. that we didn't yet own for a long time. Travis texted me a picture of this nasty old thing that he found at D.I. In the picture he texted me it looked like real wood. When he got it home I realized it wasn't. It was a veneer, and a pretty crappy one at that. There were many times throughout this process that I cursed myself for even trying to refinish something that should have been in the dump. But I had a vision and couldn't stop. Now I am happy I tried because I am pleased with the outcome and now I know that if I can make a piece of junk functional that I am excited to try on some real wood.
I followed a few different tutorials online. Basically Travis lightly sanded the veneer. Just enough to take off the shine.
 Then we primed the entire outside. We didn't even bother with the inside, because, frankly, this credenza isn't going to last long.
 Then I painted a couple coats of Behr Ultra with Primer. The color is Behr Darkest Grape. We used the finish that is in between Semi-gloss and Flat. What is that? Satin?
These pictures DO NOT do it justice. This is looking almost dark lavender. The piece, while certainly purple, is deeper than this.

Monday, January 16, 2012

Lydia's fairy birthday invites

 We made these little fairy invitations for Lydia's birthday party. They were little pop-up fairies.
 Lydia colored some of them and I colored others.
This is just showing how when you opened it, the fairy popped out.