Sunday, December 25, 2011

Felt Advent Calendar

I made this Pottery Barn knock off Advent calendar probably 7 years ago. I am always so happy to hang it up each year.

Saturday, December 24, 2011

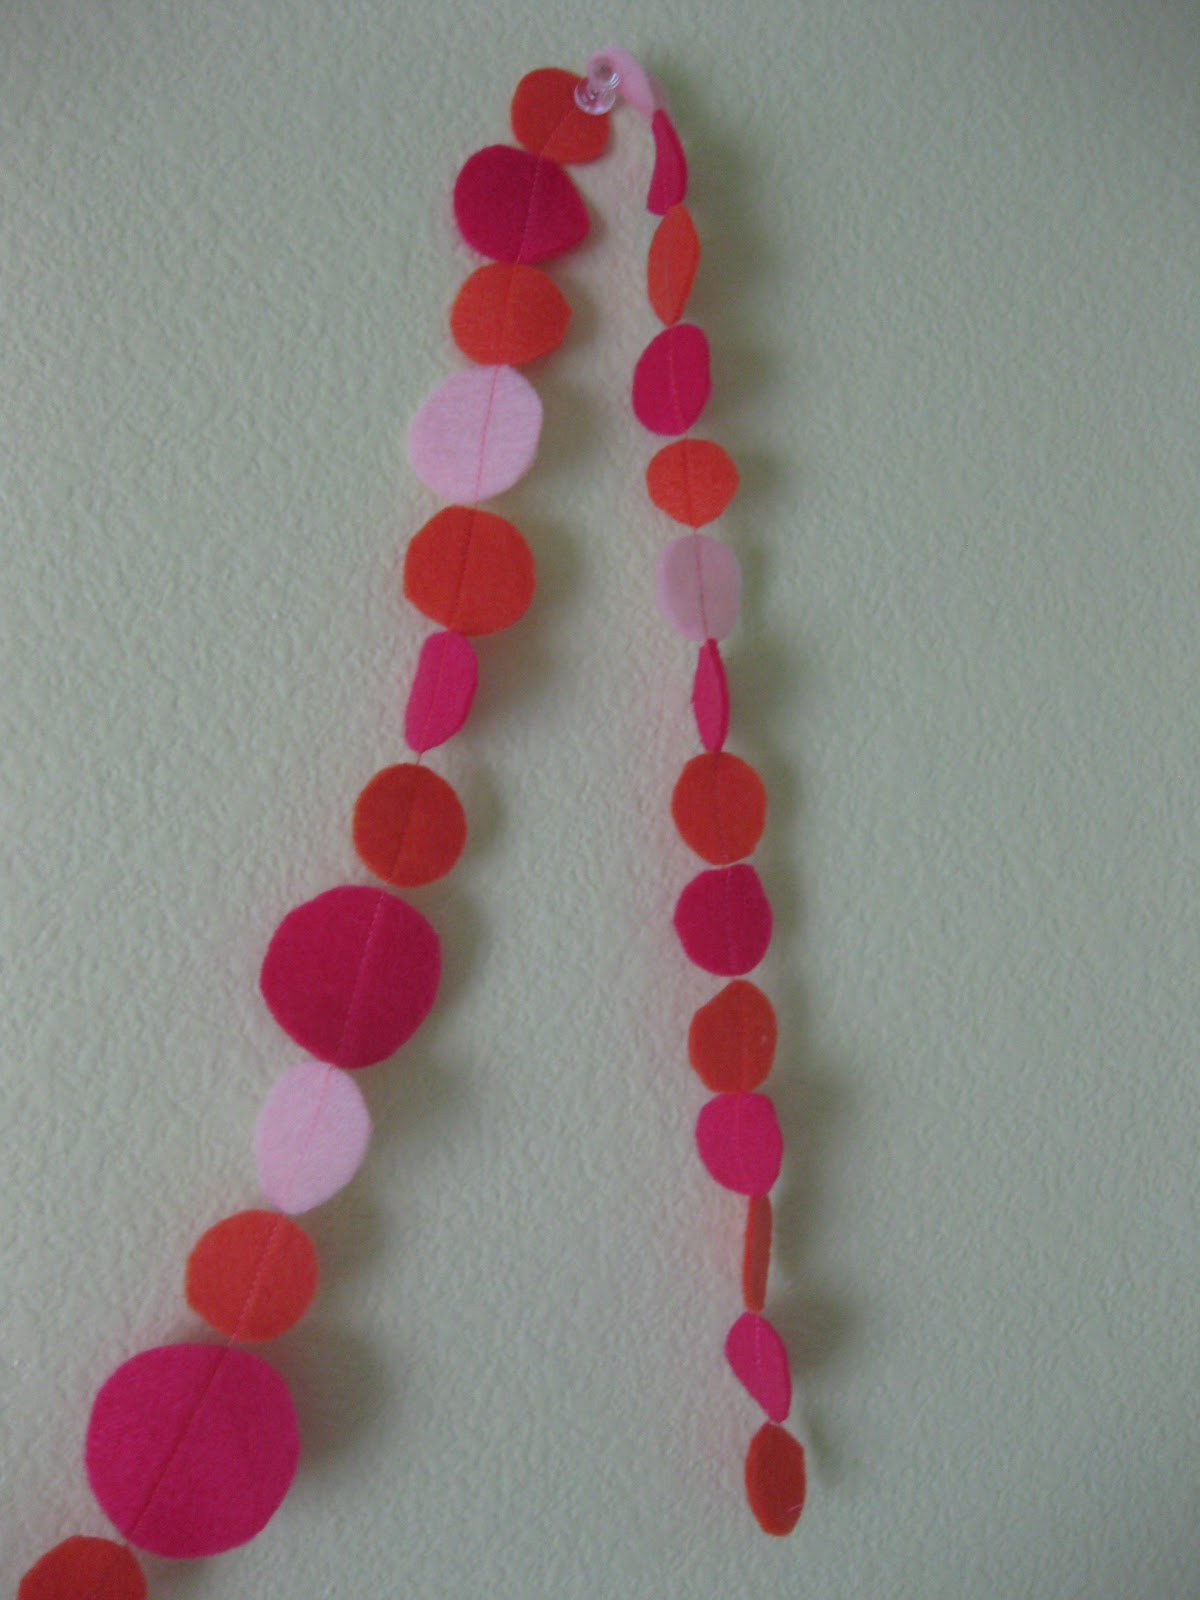
Christmas felt circles banner

This is just not cute in this lighting. I made two of these felt circles banner. I love how they give a pop of holiday color wherever you put them. They really are super bright and fun.
Saw this on Pinterest, but have seen it on several blogs.

Friday, December 23, 2011


Found some fun ideas for Christmas Teacher Gifts on Skip to my Lou. These are bookmarks. Lydia was able to help by making the flower on the right. She was really proud to give it to her teacher. Zoe made her teachers bookmarks herself out of string and beads.

Thursday, December 15, 2011

Christmas gifts- another fabric necklace

We only have one sibling per year to give gifts to in my family. It was so fun to find gifts for my brother's family this year. This necklace I made for my sister in law. I don't know how I feel about it. I guess it would look cute on some people. I don't like it on me, but my SIL is super cute and could pull it off. I hope she likes it.
The other thing I made for my nephews was a tent that fits over their table, making an instant fort inside. I already wrapped and sent said item without taking a picture. I hope to get a picture when it is in it's home, in use. I made it from old sports sheets. I hope it is loved.

Wednesday, December 14, 2011

Refasion: shirt to Lydia's skirt

 I had this shirt that someone gave me that I wouldn't ever wear, but loved the fabric. I thought it would make a fun skirt. Luckily, Lydia would wear a skirt everyday if she could. I cut off the top, making sure to leave enough fabric for a skirt for L.
 I gathered the top.
 Then I put on this elastic that I bought on Pick your Plum. It was a little difficult to work with, or at least I had never done it before. I had to go over it a couple times because the gathers kept sneaking out.
I didn't even have to hem it.
 She loves it. It took a half hour. It was free. Success.

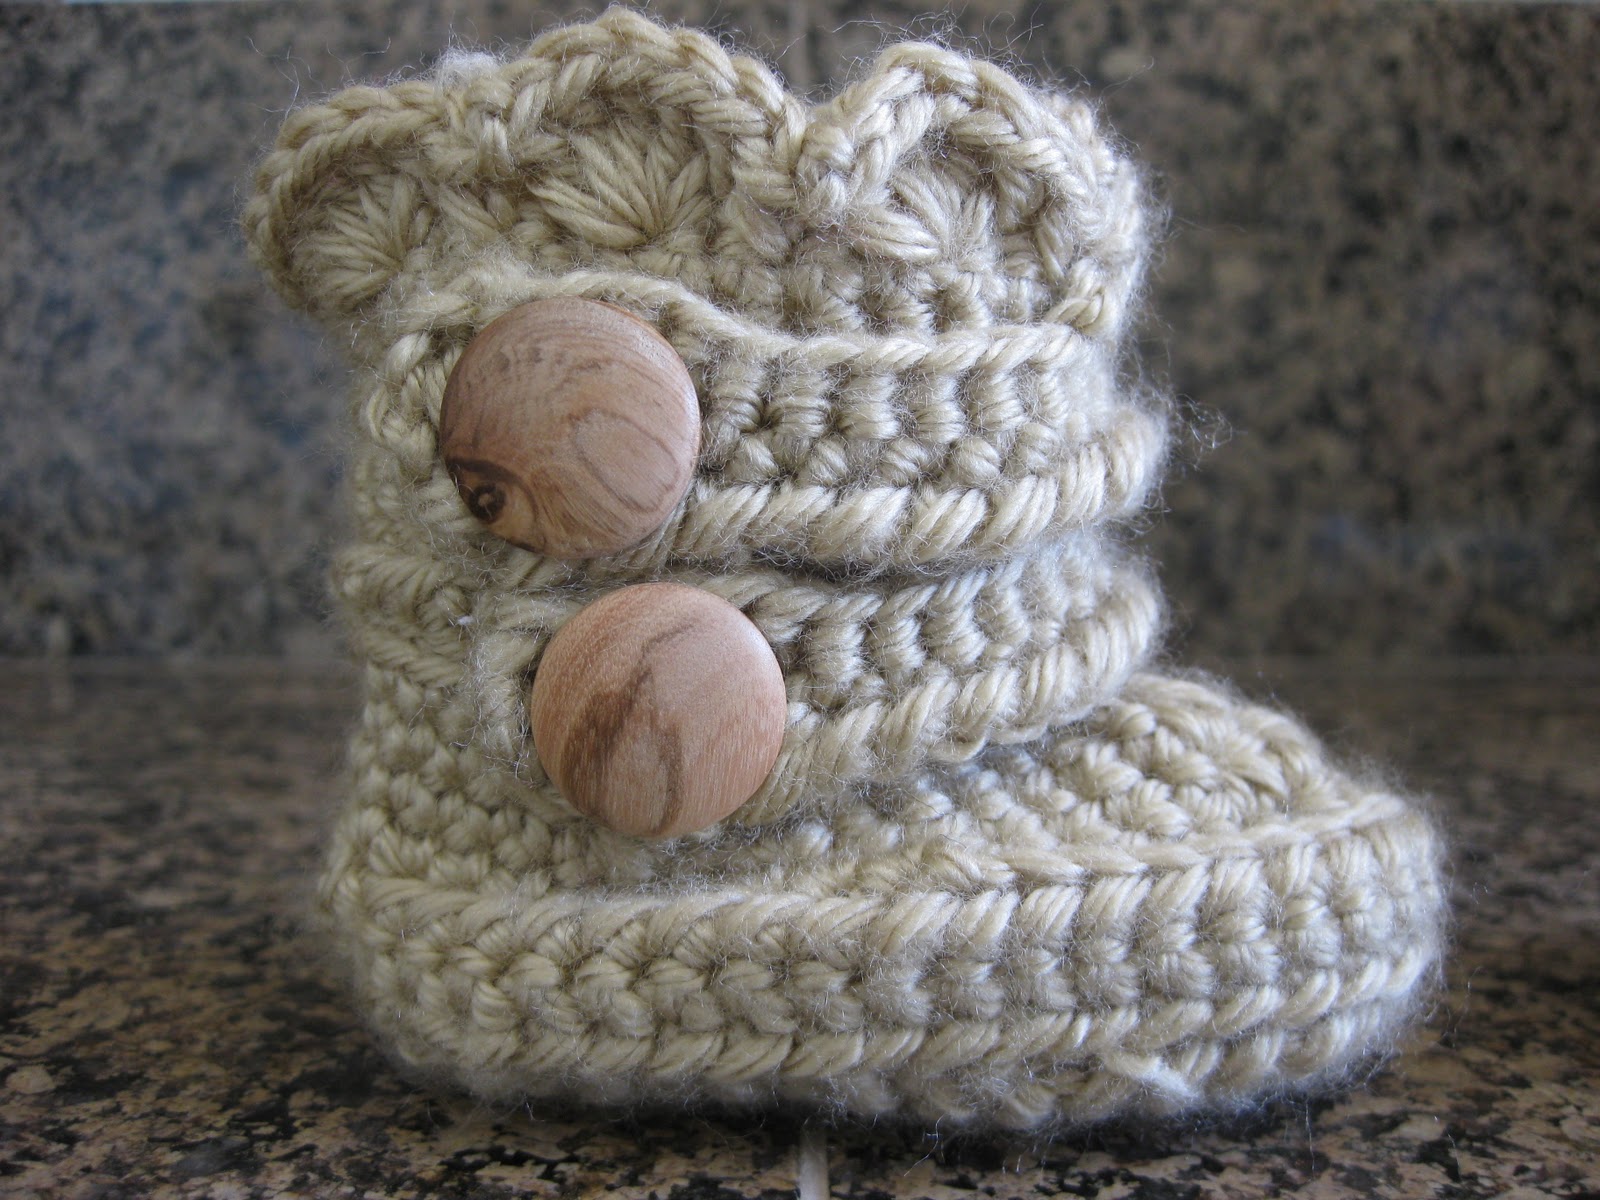
Christmas gifts-more booties

I actually have many more pair to make for all of the babies coming into the world. This pair I made for my neice, Leia. They have pink buttons!

Tuesday, November 29, 2011

Children's table turkey

 I got this lovely idea on Pinterest. I had to make it. Shawna helped me realize my dreams. Here she is taking it out of the oven :)
 Here it is, complete with garnishes (stolen from the veggie tray).
And after we carved it, the kids dug in. They actually didn't eat any more than they ate of the actual turkey. It was disgusting, because it wasn't swimming in butter. But it was cute.

P.S. I am traumatized today because I found a blog that has the same name as mine! I thought I was so clever, too.

Monday, November 14, 2011

Refasion: my shirt to Zoe's shirt

 Not the greatest picture, but this is me wearing that pink shirt about a year and a half ago. Everytime I wore the shirt Zoe would say, "Mom, I wish I had a shirt like that!" Well, it got a hole in it (all of my shirts have holes in the front, I think it is from leaning my belly where the granite tile is rough when I do the dishes, and cook?).
I was going to throw it out but I decided to turn it Zoe sized instead.
It worked out so well! Okay, so I should've done a tutorial, but I never know if it WILL turn out. You know I only post things on here if they turn out. How many projects have I NOT posted because they flopped? Lots :)

Repurposing: flare leg cords to "skinny" cords

 I mind as well call this post "I am cheap", because that is pretty much what this comes down to. I just got some boots with which I need to wear skinny jeans. I don't have any skinny jeans, due to the fact I just don't think I should wear them. I am "curvy" and I don't think that they are made for curvy ladies. They are, after all called "skinny" jeans. But I love my boots enough that I will wear skinny jeans, or in this case, skinny cords.
 Here are some old cordoroy flare leg pants that someone gave me (that is how I get most of my clothes :) I decided I wanted to be able to wear them with my boots. I had turned some flare jeans of Zoe's into skinnies and they worked out so well, I decided to try for myself.
 I think they turned out okay. I will wear them anyway.
I also tried with some jeans and they worked out great as well. Now I have two pairs of skinny jeans and spent no money. Also, I don't have to say I broke my vow never to buy skinny jeans.

Tuesday, October 18, 2011

Twirly skirt with pockets

 Found this skirt from Matilda Jane clothing. Also, I pinned it on my Sewing Clothing board on Pinterest. It is so adorable. I love the pockets. I nearly couldn't contain myself. I HAD to make it immediately! Luckily I had some fabric!
 I started out taking tons of pictures, planning on doing a tutorial. Well, I was very sure several times during the process that I had ruined the skirt and it wouldn't be savable, so I scrapped the tutorial idea.
 But it worked out. I want to make another one soon. If it turns out easier than this one, I will post the tutorial. Maybe one in fall colors. I was trying to convice Zoe to let me make her one. I think a ten-year-old could pull it off in the right colors, and some chunky tights? Don't you think?

Tuesday, October 11, 2011

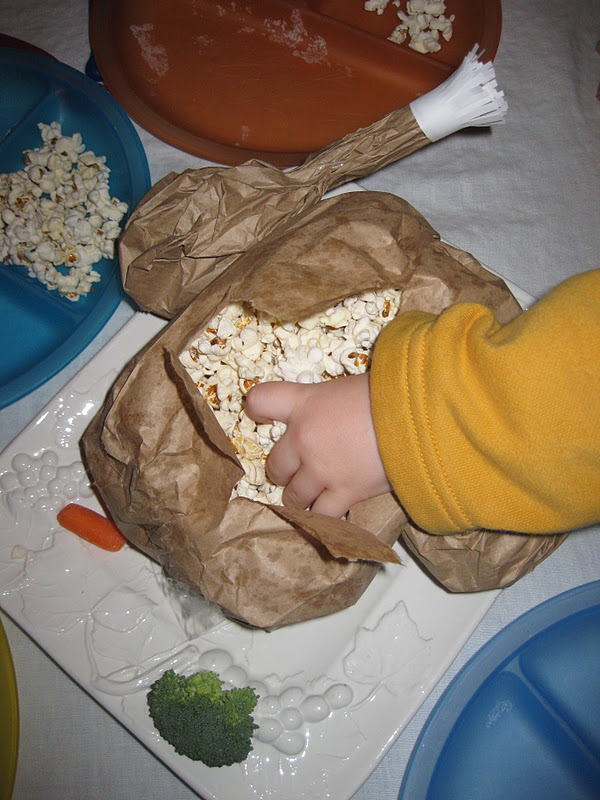
Lego Head Pinata tutorial

So, you can buy pre-cut circles of foam. I (always on a budget) went the cheaper route and bought a huge sheet of styrofoam and cut out circles. Also buying this one item I was able to use my Joann 40 % off coupon. I traced the circles onto the foam with a Sharpie. I actually traced some plates and saucers I had.
Two doughnut shaped ones for the top piece 7(?) inches diameter, 2 pieces 8 1/4 in. diameter circles for top and bottom, one circle 8 inch diameter for the very bottom connector piece. If this is confusing look at a minifigure head and it may be more clear.
Cut out the circles and round the edges a bit. I just used a serrated kitchen knife.
I used painters tape to attached the two doughnut pieces together and set them on the "top" piece.
Tape the "bottom" piece to some posterboard. This is horrible but I have forgotten the measurement I used for the paper. Ten inches maybe? Try out different measurements until it looks right. (Hey, this is my first tutorial. I guess I am learning a lot :)
The "top" piece needs a hole cut into it, that the candy will eventually go into. Keep the piece that comes out to "cork" it back up after candy goes in. Also, if you look closely you can see that I cut some little holes for the rope to go in.
Here it is all taped together. You begin to see it taking shape. This part was really hard. The painters tape was not super sticky so the top kept falling into the paper tube. I resisted using duct tape for fear that it would be too sturdy and we wouldn't be able to get into it when it was time. Also, keeping the paper from collapsing (you can see the dent on the right side) was a challange.
The next challange was trying to get the sticky, gluey, newspaper to stick to the foam. It did not want to stick. I ended up just laying it on in places and letting it dry. The next layer wasn't so hard. But the shape was really compromised because of these sticking difficulties.
I put the rope into the holes and knotted it. It stayed in really well and it was really sturdy.
I use a 1:1 ratio of water to flour for the glue. I put on one layer of newspaper with the glue, covering the entire pinata then let it dry completely. Then do another complete layer of newspaper and let it dry. It usually takes many hours to dry. Even in the direct sun can take 3-4 hours (that is why I start making the pinata several days ahead). You could probably put a heater on in front of it to hurry the process.
After the two newspaper layers are dried I put on a layer of plain white paper. It takes less paint to paint over white, rather than newsprint.
When completely dry start painting. When the paint is totally dry, fill it will candy, then put the stopper back in. This was definitly a plus about this particular pinata. Usually with a balloon based pinata, when the second newspaper layer is dry you cut through the layers to make a little "trapdoor" in an inconspicuous spot. Also, a spot that isn't vulnerable. So, not toward the bottom and not close to where the rope is connected. Fill with candy (not chocolate if you are drying in the sun :) Then proceed with white paper layer and paint.
Then decorate. I saw somewhere on the internet someone used a scared face on their Lego Minifigure Head Pinata. I thought it was a must. I penciled it on first, then used Sharpie. For the mouth I used a piece of heavy white paper, with Sharpie then glued onto the pinata.
Look at that puffy toddler hand grabbing for the goodies inside. No wonder Lego head is so scared, a labotamy is looming.
What questions do you have? Is this rather clear? It is harder to describe than I thought it would be.

Halloween Decor (total $7)

 I really, really, really wanted to decorate for Halloween this year. The problem was that my budget didn't allow for many purchases, and I have very few decorations from years previous.
I was pretty proud of my ingenuity on this project. Wreath: grapevine wreath ($1), black spray paint ($3), creepy crawlies (some found around the house, others $1), burlap ribbon (old rice bag $0, had paint $0)
 Mimi and Pa bought us pumpkins when they were here. Black paper bats (have had that heavy black paper forever! $0)
 Pipe cleaner spiders I made a couple years ago ($0)
 Black crow ($1) wish I would've gotten more of these. Spray painted pumpkin turned out fun!
 Man eating pumpkin! Shoe, sock, jeans (had them $0)!
Had spider webs from last year, pipe cleaner spiders, skeleton garland in window (part of the creepy crawlers $1 pack, strung on ribbon I had).
Not pictured, orange string lights (previous year $0)
Do like how many times I put $0 ? I liked it too. I was pretty happy with the decorations and how it turned out. The kids had a lot of fun putting it together with me. Many of the bats have fallen down and the cobwebs are no longer up thanks to the wind that blows through there.
I found most of these ideas on Pinterest. Which I pinned to my Halloween Board.

Monday, October 3, 2011

Felt circles banner

 I had seen this somewhere and thought if was really cute, and very simple.
 I had some of Zoe's favorite colors (and the colors of her room) of felt and decided this would make a fun accent in her room.
It turned out really fun and whimsical. The color in this picture is not true. It is orange, hot pink, and light pink. Her walls are Spring Green.

Birthday Banner (girl version)

Since Zoe's birthday was coming up, I decided I needed to make a girl version of this boy birthday banner that we have enjoyed having up around the boy's birthdays. It makes the house feel festive and fun. Not the greatest picture, but you get the idea.

Thursday, September 22, 2011

Crochet Baby Boots

 I saw these on Pinterest and knew I HAD to get the pattern. What baby girl should NOT wear these? There are SO many babies being born in my life this year, specifically baby girls (not to gloss over the sweet baby boys, but for the sake of the post, I don't think they would be interested). Some dear friends adopted a sweet baby girl (Samara) this week (and has already received a pair with pink buttons, I will see if I can get a pic of her wearing them). My wonderful childhood friend had a girl this week (Finley). My dear sister-in-law could be having a baby girl at any moment!!!! Here is my question. Could a baby living in Hawaii or Texas even use boots like these?
So adorable! (Thank you for overlooking my annoying use of parenthesis and CAPS in this post).

Monday, September 19, 2011

Lego Party- Pinata!

 I will add on a step by step tutorial on how to make this Lego head pinata in another post.
Have I killed the Lego theme by now? I saw this great idea for a Lego head pinata (which is what Liam requested). I liked the scared face. He is about to get his brains knocked out!
 Liam was so excited about it. Again, I got some video of the boys hitting the pinata, but they aren't very good. Note to self: next time take stills of the pinata slaughter. The funnest image would be the candy all flying through the air, but you never know when it will happen. That is why it is so fun!
The bottom broke off. Travis sporting the Lego look.

Lego Party- Cake and Decorations

 Cake and Decorations are my least favorite aspect of party planning. I love baking. I love decorating. For some reason they always stress me out the most. I think it is because I have unrealistic expectations that I am unable to make happen.
I found a couple of super cute ideas for Lego themed cakes here and here but knew there was no way I could pull them off. So, it doesn't matter what I had planned, this is what happened. I was trying to get my cake out of the pan to cool. It slipped out and landed on the counter in pieces. I got it put back in as best I could. But this is what I had to work with:
 I decided to cut squares out of the usable parts and turn them into "cupcakes".
 Then I surrounded them with chocolate Lego bricks. Piped some colorful frosing on them.
 Put some chocolate minifigures on top and some candles and Happy Birthday skewers.
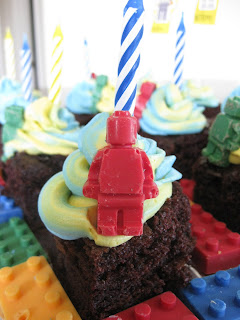
At least they tasted good and the boys were thrilled. They played with the minifigures and built with the chocolate bricks. So I am happy with it, even if it wasn't the original plan.

I won't even include a picture of decorations. Streamers and balloons. You could tell it was a party.